Daniel sent us this one — he's been staring at a closet full of vacuum-sealed bags and realizing he can't tell the winter coats from the wool sweaters without opening every single one. The core problem: Ziploc bags and vacuum storage bags are low surface energy plastics, which means labels don't stick, and even when they do, the markings are too small to read from across the room. He's asking for a practical toolkit. Surface prep workarounds, what blank label materials actually adhere, which markers last on vinyl or polyester, and what it takes to print labels at five centimeters or larger that will stay put. It's the home organization problem nobody solves with real chemistry.

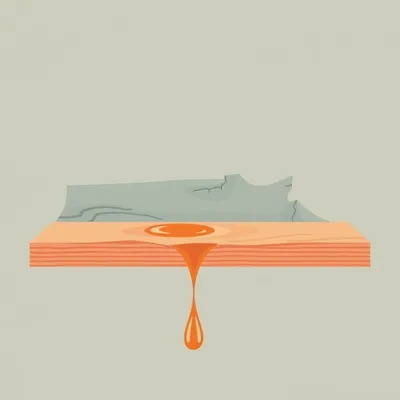
It's a problem that hits right at the intersection of polymer science and pure frustration. Here's the thing — most people don't realize they're fighting physics. Polyethylene, which is what Ziploc bags are made of, has a surface energy of about thirty-one dynes per centimeter. Most adhesives need at least thirty-eight dynes per centimeter to wet out properly. Wet out is just the technical term for the adhesive flowing into the microscopic nooks and crannies of the surface. If it can't flow, it can't grip. It's like trying to get water to spread on a waxed car hood — it beads up instead of flattening out.
The bag is essentially rejecting the label at a molecular level. It's not that the adhesive is weak. It's that the surface won't let it do its job.
And this is where most advice falls apart. People say just use a Sharpie directly on the bag. But Sharpie ink is alcohol-based, and on polyethylene the solvent can't penetrate the surface. The ink beads up, dries on top, and flakes off within days. What looks like it worked in the moment is actually just a temporary illusion.
The Sharpie of Damocles.
It's always hanging over your winter wardrobe. So let's start with the first category — surface preparation. The goal is to raise that surface energy from thirty-one dynes per centimeter to something above thirty-eight. There are industrial products that do exactly this. The most well-known is 3M's Primer 94. It's an adhesion promoter — basically a low-viscosity solvent-based primer that deposits a thin layer of chemistry on the surface that adhesives can actually bond to. It raises surface energy to above forty dynes per centimeter, which puts you in the sweet spot for standard label adhesives.
This is something a consumer can actually buy?
It runs about fifteen dollars for an aerosol can as of mid-2026. Permabond POP is another option, similar chemistry. But here's the tradeoff — these are solvent-based products. They require ventilation, they have a strong odor, and they can leave a residue on the bag. You're not going to want to use them in a closed closet. And on thin vacuum bags, the solvent can potentially interact with the plastic if you over-apply. So it works, but it's not exactly a kitchen-table solution.
It's the kind of thing where you open a window, put on gloves, and feel vaguely like you're doing something illegal while labeling your sweaters.
That's the spirit of home organization right there. Now, you mentioned microscopic abrasion in the prompt. The idea that if you can rough up the surface, the adhesive has more to grab onto. On a rigid plastic part, you'd use fine-grit sandpaper. On a Ziploc bag, sandpaper will tear right through. The plastic is too thin, and any abrasion creates stress points that become tears the moment the bag flexes.
Sandpaper is out. What about flame treatment?
Flame treatment is a real industrial process. You pass a flame briefly over the polyethylene surface, and it oxidizes the top layer, raising surface energy dramatically. It's used in manufacturing all the time for things like car bumpers and plastic packaging. But for a consumer at home with a vacuum bag full of down jackets? You're one second of distraction away from melting the whole thing. Polyethylene melts at about a hundred and five degrees Celsius, and a flame is way hotter than that.
I'm picturing someone in their living room with a blowtorch and a bag of christmas decorations. What could go wrong.
The insurance claim writes itself. Corona discharge treatment is another industrial method — it uses high-voltage electrical discharge to oxidize the surface. Also not available to consumers. So what does work? There's a surprisingly effective trick that doesn't involve abrasion at all. It's about contamination removal. Polyethylene bags often have a thin layer of mold release agents or plasticizers on the surface from the manufacturing process. These are low molecular weight compounds that migrate to the surface over time and act like a barrier between the adhesive and the actual polymer. A wipe with isopropyl alcohol — like the ninety-plus percent stuff — followed by a clean microfiber cloth can remove that layer. It's not changing the surface energy of the polyethylene itself, but it's removing the stuff that makes an already bad situation worse.
You're not making the surface more receptive. You're just getting rid of the invisible film that's actively sabotaging adhesion.
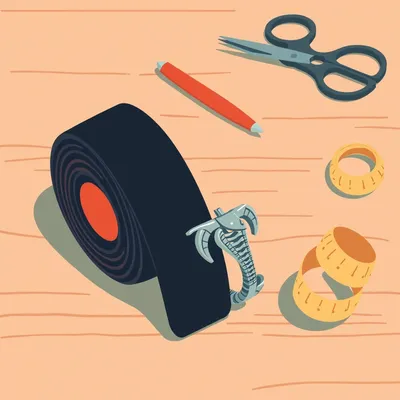
And in practice, that alone can make the difference between a label failing in a few hours and lasting a few days. It's not a permanent fix, but it's step one of any good workflow. Now, the trick I'm most excited about — and this is one I hadn't heard of before digging into this — is the packing tape method. You take a strip of strong packing tape, something like Scotch Heavy Duty Shipping Tape, apply it firmly to the area where you want the label, and then peel it off.
You're using the tape to pull off a micro-layer of the surface.
Polyethylene is soft enough that the tape's adhesive actually shears off a microscopic amount of the surface layer, along with any contaminants sitting on top. What's left is a slightly fresher, slightly higher-energy surface. It's not dramatic — you're not going to measure a huge jump in dynes per centimeter — but it's enough that adhesives get a better mechanical grip. And because the tape is doing the work, you're not creating the kind of stress points that sandpaper would.
It's like exfoliating your Ziploc bag.
The most gentle polyethylene facial on the market. And there's one more technique worth mentioning — heat activation. After you apply the label, you use a hair dryer on the low setting and warm the label for about ten seconds. The heat softens the adhesive, allowing it to flow into those surface irregularities that it couldn't penetrate at room temperature. It's the same principle behind why stickers adhere better to warm surfaces. But you have to be careful. Polyethylene melts at about a hundred and five degrees Celsius. A hair dryer on high can hit a hundred and forty degrees. So low setting only, and keep it moving.
You're walking a fine line between better adhesion and a puddle of molten plastic with your winter coat sealed inside forever.
Which, I suppose, is one way to ensure you never lose track of that coat. It's now part of the bag. But used correctly, heat activation is genuinely effective. I've seen tests where a standard address label applied to a Ziploc bag without any prep failed within twenty-four hours — edges curling up, peeling off completely. With the isopropyl alcohol wipe, the packing tape trick, and ten seconds of low heat, the same label stayed flat and readable for over a week. Add a primer like 3M 94 into the mix, and you're looking at months.
The workflow is starting to take shape. Alcohol wipe, tape peel, maybe a primer, then heat. That's surface prep. But once you've done all that, the next question is what you're actually sticking on there.
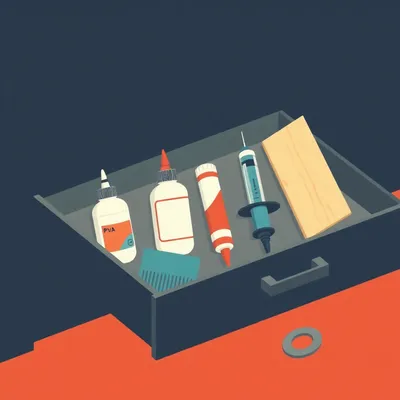
This is where label substrate selection becomes critical. Most people grab whatever label is in the drawer — usually a paper address label. Paper labels are a disaster on polyethylene. Paper absorbs moisture from the air, expands and contracts, and the adhesive on standard paper labels is designed for paper envelopes, not LSE plastics. They fail within days. What you want is either vinyl or polyester.
What's the difference?
Vinyl labels — and we're talking PVC here, polyvinyl chloride — are flexible and conformable. They're great for curved surfaces because they stretch slightly and don't pop back up at the edges. That's important on a vacuum bag, which is never going to be perfectly flat. The downside is that vinyl can plasticize over time — the plasticizers migrate out, and the label becomes brittle, especially in cold storage. Polyester labels, which are PET, are more rigid and dimensionally stable. They don't stretch as well, so edge lift can be an issue on curved surfaces, but they're incredibly durable and don't degrade the way vinyl can. Both have surface energies around forty-two to forty-four dynes per centimeter, which means markers and inks can actually write on them.
Vinyl for curves, polyester for flat surfaces and longevity. Where do you actually find these things?
This is easier than most people think. com, Avery, and LabelValue all sell vinyl and polyester labels in consumer quantities. You want to look for product descriptions that mention LSE or low surface energy. The Avery 22806 is a vinyl label, two by four inches, designed for LSE surfaces. OnlineLabels has their OL177, which is polyester, three by five inches. These are pre-cut, ready to use, and they come in sheets that work with standard printers. A pack of a hundred sheets might run you fifteen to twenty dollars.
If you want to go bigger? The prompt mentioned labels large enough to read from across the room.
That's where cutting your own comes in. You can buy vinyl sheets from brands like Grafix or Dura-Lar — these are blank sheets, no adhesive, that you'd adhere with your own adhesive or use as overlay labels. But the better approach is buying adhesive-backed vinyl or polyester sheets. A rotary cutter is the tool for this — something like a Fiskars twelve-inch rotary cutter with a fresh blade, a metal ruler, and a self-healing cutting mat. You can cut labels to any size you want. The key is a sharp blade. A dull blade will drag and stretch the material instead of cutting cleanly.
For people who want perfectly shaped labels without the manual labor?
That's where cutting machines come in. A Cricut or Silhouette machine can cut vinyl and polyester sheets into any shape you want — circles, rounded rectangles, whatever. But that's a separate investment. A Cricut Explore starts around two hundred dollars. It's great if you're labeling an entire home inventory system and want consistency, but it's overkill for most people. The rotary cutter and ruler approach will get you there for about twenty-five dollars.
Now you've got your surface prepped and your label chosen. The third piece is what you actually write with. The prompt asks specifically about alcohol-based versus paint-based markers.
This is where I get excited, because the differences are dramatic and testable. Alcohol-based markers — your standard Sharpie, Pilot Pintor, things like that — work by having the alcohol solvent carry pigment into the surface. On paper, that's great. On vinyl or polyester, the solvent can partially penetrate the surface, so the mark bonds reasonably well. But alcohol-based ink has two big weaknesses. One, it fades in UV light. If your storage area gets any indirect sunlight, those marks will start disappearing within months. Two, it can smear if it gets wet. If you're pulling bags out of a basement that had a minor leak, or condensation builds up, your labels can become illegible.
What's the alternative?
Paint-based markers. Specifically, oil-based paint markers. These use a pigment suspended in an oil-based vehicle that dries by oxidation rather than evaporation. The pigment sits on top of the surface and forms a durable film. Sharpie makes an oil-based paint marker line — these are different from the standard Sharpie, and you have to shake them and pump the tip to get the paint flowing. Molotow Liquid Chrome is another option, though that's more of an art supply. Posca markers are water-based paint markers — good opacity, good UV resistance, but they can chip if the label flexes repeatedly.
If you had to declare a winner.
For writing on vinyl or polyester labels that are going onto vacuum storage bags, the winner is oil-based paint markers. I've seen comparison tests where a standard Sharpie on a vinyl label adhered to a vacuum bag became faded and partially illegible after three months in indirect light. A Posca marker lasted about six months before showing wear. The oil-based Sharpie paint marker was still crisp and fully legible after six months. The film it forms is more flexible, more UV-resistant, and more water-resistant than alcohol-based ink.
The workflow is: clean the bag, tape-peel it, apply a vinyl or polyester label, write with an oil-based paint marker, heat-set it. That's five steps to label a bag of sweaters.
It sounds like a lot, but each step takes seconds. The whole process is maybe two minutes per bag. And the alternative is pulling out six vacuum bags every spring trying to find the one with the kids' winter coats.
Or, as the prompt suggests, going the printable route. If you want to skip the handwriting entirely and print labels at scale, what does that look like?
This is where we get into a different tier of solution. The gold standard for printing durable labels on LSE surfaces is thermal transfer printing. This is not the receipt printer you see at the grocery store — that's direct thermal. Direct thermal uses heat-sensitive paper that darkens when heated, and it fades in heat and light. Thermal transfer uses a heated print head to melt a wax or resin ribbon onto the label surface, creating a permanent bond.
What's the cost of entry?
A basic thermal transfer printer like the Zebra LP2844 runs about two hundred dollars. Resin ribbons — and you want resin, not wax, for durability on plastic labels — cost about twenty dollars per roll, and a roll will do over a thousand labels. The labels themselves are sold in rolls, and you can get polyester labels specifically designed for thermal transfer in sizes up to four by six inches. That's well above the five-centimeter threshold. The print is essentially permanent. It survives freezers, heat, abrasion, moisture — it's what warehouses use for inventory tracking.
Two hundred dollars is a real investment for home organization. What's the step down?
A laser printer with polyester labels. If you already own a laser printer, you can buy sheets of polyester labels — like the Avery 22806 I mentioned — and print directly on them. Laser printers use toner, which is a fine plastic powder that's fused to the surface with heat and pressure. On polyester labels, the fusion is pretty good. Not as durable as thermal transfer — if the labels are rubbing against each other in a packed box, you might see some abrasion over time — but perfectly adequate for storage bags that are sitting on a shelf. The key is making sure your printer's fuser is working properly. If the toner isn't fully fused, it'll flake off.
Inkjet is the weakest option for this application. Most inkjet inks are water-based, which means they can run if the label gets damp. There are solvent-based inkjet inks, but those are generally for commercial wide-format printers, not the desktop model in your home office. If you print on vinyl with a standard inkjet, you'll get a decent image initially, but it won't hold up to handling or humidity the way toner or thermal transfer will. For labels that need to last through seasons of storage, inkjet is not the move.
The hierarchy is thermal transfer at the top, then laser on polyester, then handwriting with oil-based paint markers, then inkjet bringing up the rear. Where does direct thermal fit?
Direct thermal is the worst option for this use case. It's what you get with those little handheld label makers that use thermal paper cartridges. They're convenient, and the labels are small and tidy, but they will fade if exposed to heat — like, say, a warm closet in July — and the adhesive on those cartridges is usually designed for paper and standard surfaces, not LSE plastics. You'll get edge curl within days.
The tiny label maker that everyone bought to organize their pantry is useless for vacuum bags.
And that's the trap. People think a label is a label, and they're confused when the same system that works beautifully on glass jars and plastic bins fails completely on Ziploc bags. It's not the label maker's fault — it's doing exactly what it was designed to do. It's just that polyethylene is playing a different game entirely.
There's something almost perverse about it. The very property that makes Ziploc bags useful — that nothing sticks to them — is exactly what makes them impossible to label.
It's intentional. Ziploc bags are designed to have low surface energy precisely so that food doesn't stick to the inside. The same chemistry that releases your frozen marinara sauce is what rejects your label. You're fighting a feature, not a bug.
Let's pull this all together. If someone is listening and they've got a closet full of vacuum bags they need to label this weekend, what's the practical workflow?
Step one, clean the bag where the label will go with isopropyl alcohol and a microfiber cloth. Step two, apply a strip of strong packing tape to that spot, press firmly, and peel it off. That removes surface contaminants and micro-abrades the surface. Step three, if you want maximum adhesion, apply an LSE primer like 3M 94 — but do this in a ventilated area and let it dry completely. Step four, apply your vinyl or polyester label. Pre-cut if you bought them, or one you cut yourself with a rotary cutter. Step five, write on it with an oil-based paint marker. Step six, heat-set the label with a hair dryer on low for about ten seconds.
It's almost a ritual.
It is, but each step addresses a specific failure mode. Skip the alcohol wipe, and you're fighting manufacturing residue. Skip the tape peel, and you're fighting the intrinsic low surface energy. Skip the primer, and you're leaving adhesion on the table. Skip the right marker, and your label fades. Skip the heat-set, and the adhesive never fully wets out. The process is cumulative. Each step buys you more durability.
If you want to print instead of hand-write?
Buy polyester laser labels — Avery 22806 or equivalent — and print on a laser printer. Make sure the toner is fully fused. If you're doing enough volume to justify it, a thermal transfer printer with resin ribbons on polyester labels is the endgame. That setup will produce labels that outlast the bags themselves.
What's the single biggest mistake people make?
Using paper labels or standard address labels on LSE plastic. It's the intuitive thing to do — everyone has address labels in a drawer — and it fails every time. The adhesive isn't designed for polyethylene, the paper absorbs moisture and warps, and the whole thing peels off within days. If you take nothing else from this episode, take this: invest in vinyl or polyester labels. They're not expensive — we're talking fifteen to twenty cents per label for the pre-cut ones — and they actually work.
The other mistake is assuming a Sharpie will solve everything. You see that in every home organization forum. Just Sharpie it. And then three months later, the Sharpie is a ghost of its former self and you're opening bags at random.
The Sharpie industrial complex has a lot to answer for. It's a great marker for what it's designed for — porous surfaces, paper, cardboard. On non-porous plastics, it's a temporary solution that masquerades as a permanent one.
We've covered surface prep, label substrates, marker chemistry, and printable options. The prompt also hinted at a bigger question — what about reusable labels? If you're rotating seasonal items in and out of the same bags, you don't want to commit to a permanent label that says winter coats when next season the bag holds summer linens.
That's the frontier. Dry-erase markers on LSE plastic don't work well — the ink doesn't adhere properly, and it smears at the slightest touch. Chalk markers are slightly better, but they still need a receptive surface. The most interesting solution I've found is static-cling vinyl. It's a vinyl film that adheres through static electricity rather than adhesive. You can write on it with a paint marker, stick it to the bag, peel it off, and reuse it. The downside is that static cling doesn't work well if the bag surface isn't perfectly clean and dry, and the cling can release over time, especially if the bag flexes. It's a niche solution, but for people who are constantly reconfiguring their storage, it's worth experimenting with.
Static cling feels like the least reliable force in the universe. It's what makes socks stick to shirts in the dryer, not what I'd trust to keep my organizational system intact.
It's definitely not a set-it-and-forget-it solution. But there's active development in this space. Companies are working on reusable adhesive technologies — things inspired by gecko feet, microstructured surfaces that grip without leaving residue. Those are probably five to ten years out from consumer pricing. The nearer-term development is RFID tags embedded in labels. If every bag has a tiny RFID chip, you don't need to read the label at all — you scan it with your phone and it tells you what's inside. That's already standard in retail inventory management. For home use, it's still expensive — RFID tags run about twenty to fifty cents each in small quantities — but the technology exists.
The future is a world where you hold your phone up to a closet full of identical vacuum bags and an app tells you which one has the puffer jackets. That's either deeply efficient or deeply dystopian, and I'm not sure which.
I think it's efficient right up until the app requires a firmware update and suddenly you can't access your own winter wardrobe. But we're not there yet. For now, the practical path is the six-step workflow and the right materials.
To recap the deliverable — because the prompt asked for concrete answers across four categories. Surface prep: alcohol wipe plus packing tape peel, with optional 3M 94 primer for maximum adhesion. Label substrates: vinyl for curved bags, polyester for flat surfaces, both available pre-cut from Avery and OnlineLabels, or cut your own with a rotary cutter. Markers: oil-based paint markers beat alcohol-based markers for durability on both vinyl and polyester. Printable labels: thermal transfer is the gold standard at a two-hundred-dollar entry point, laser on polyester is the practical home option, inkjet and direct thermal are not recommended. And the single biggest mistake is using paper labels or assuming a Sharpie will do the job.
That's the toolkit. It's more steps than most people expect, but each step is fast and cheap, and the alternative is a closet full of mystery bags. Which, I'll admit, is a great name for something. Sounds like a game show where you reach into a vacuum-sealed bag and hope it's not the one with the wet swimsuits from last August.
The game show nobody asked for. And now: Hilbert's daily fun fact.
Hilbert: In the ice caves of Mount Karthala on the island of Grande Comore, the volcanic vents create natural resonance chambers where sound waves can travel through ice formations for over three kilometers without significant distortion — a phenomenon the ancient sailors of the Comoros archipelago used as a navigational reference, triangulating their position by listening for the distinctive low-frequency hum that carried across the water on clear nights.
That's either navigation or the world's earliest ambient music.
Three kilometers of ice sound. I have no follow-up questions, and I'm not sure I want any.
This has been My Weird Prompts. Thanks to our producer Hilbert Flumingtop. If you've found a labeling hack that actually works — or if you've melted a vacuum bag with a hair dryer and lived to tell the tale — email us at prompts at myweirdprompts dot com. Find us at myweirdprompts dot com or wherever you get your podcasts. We'll be back next week.
Until then, label responsibly.

")